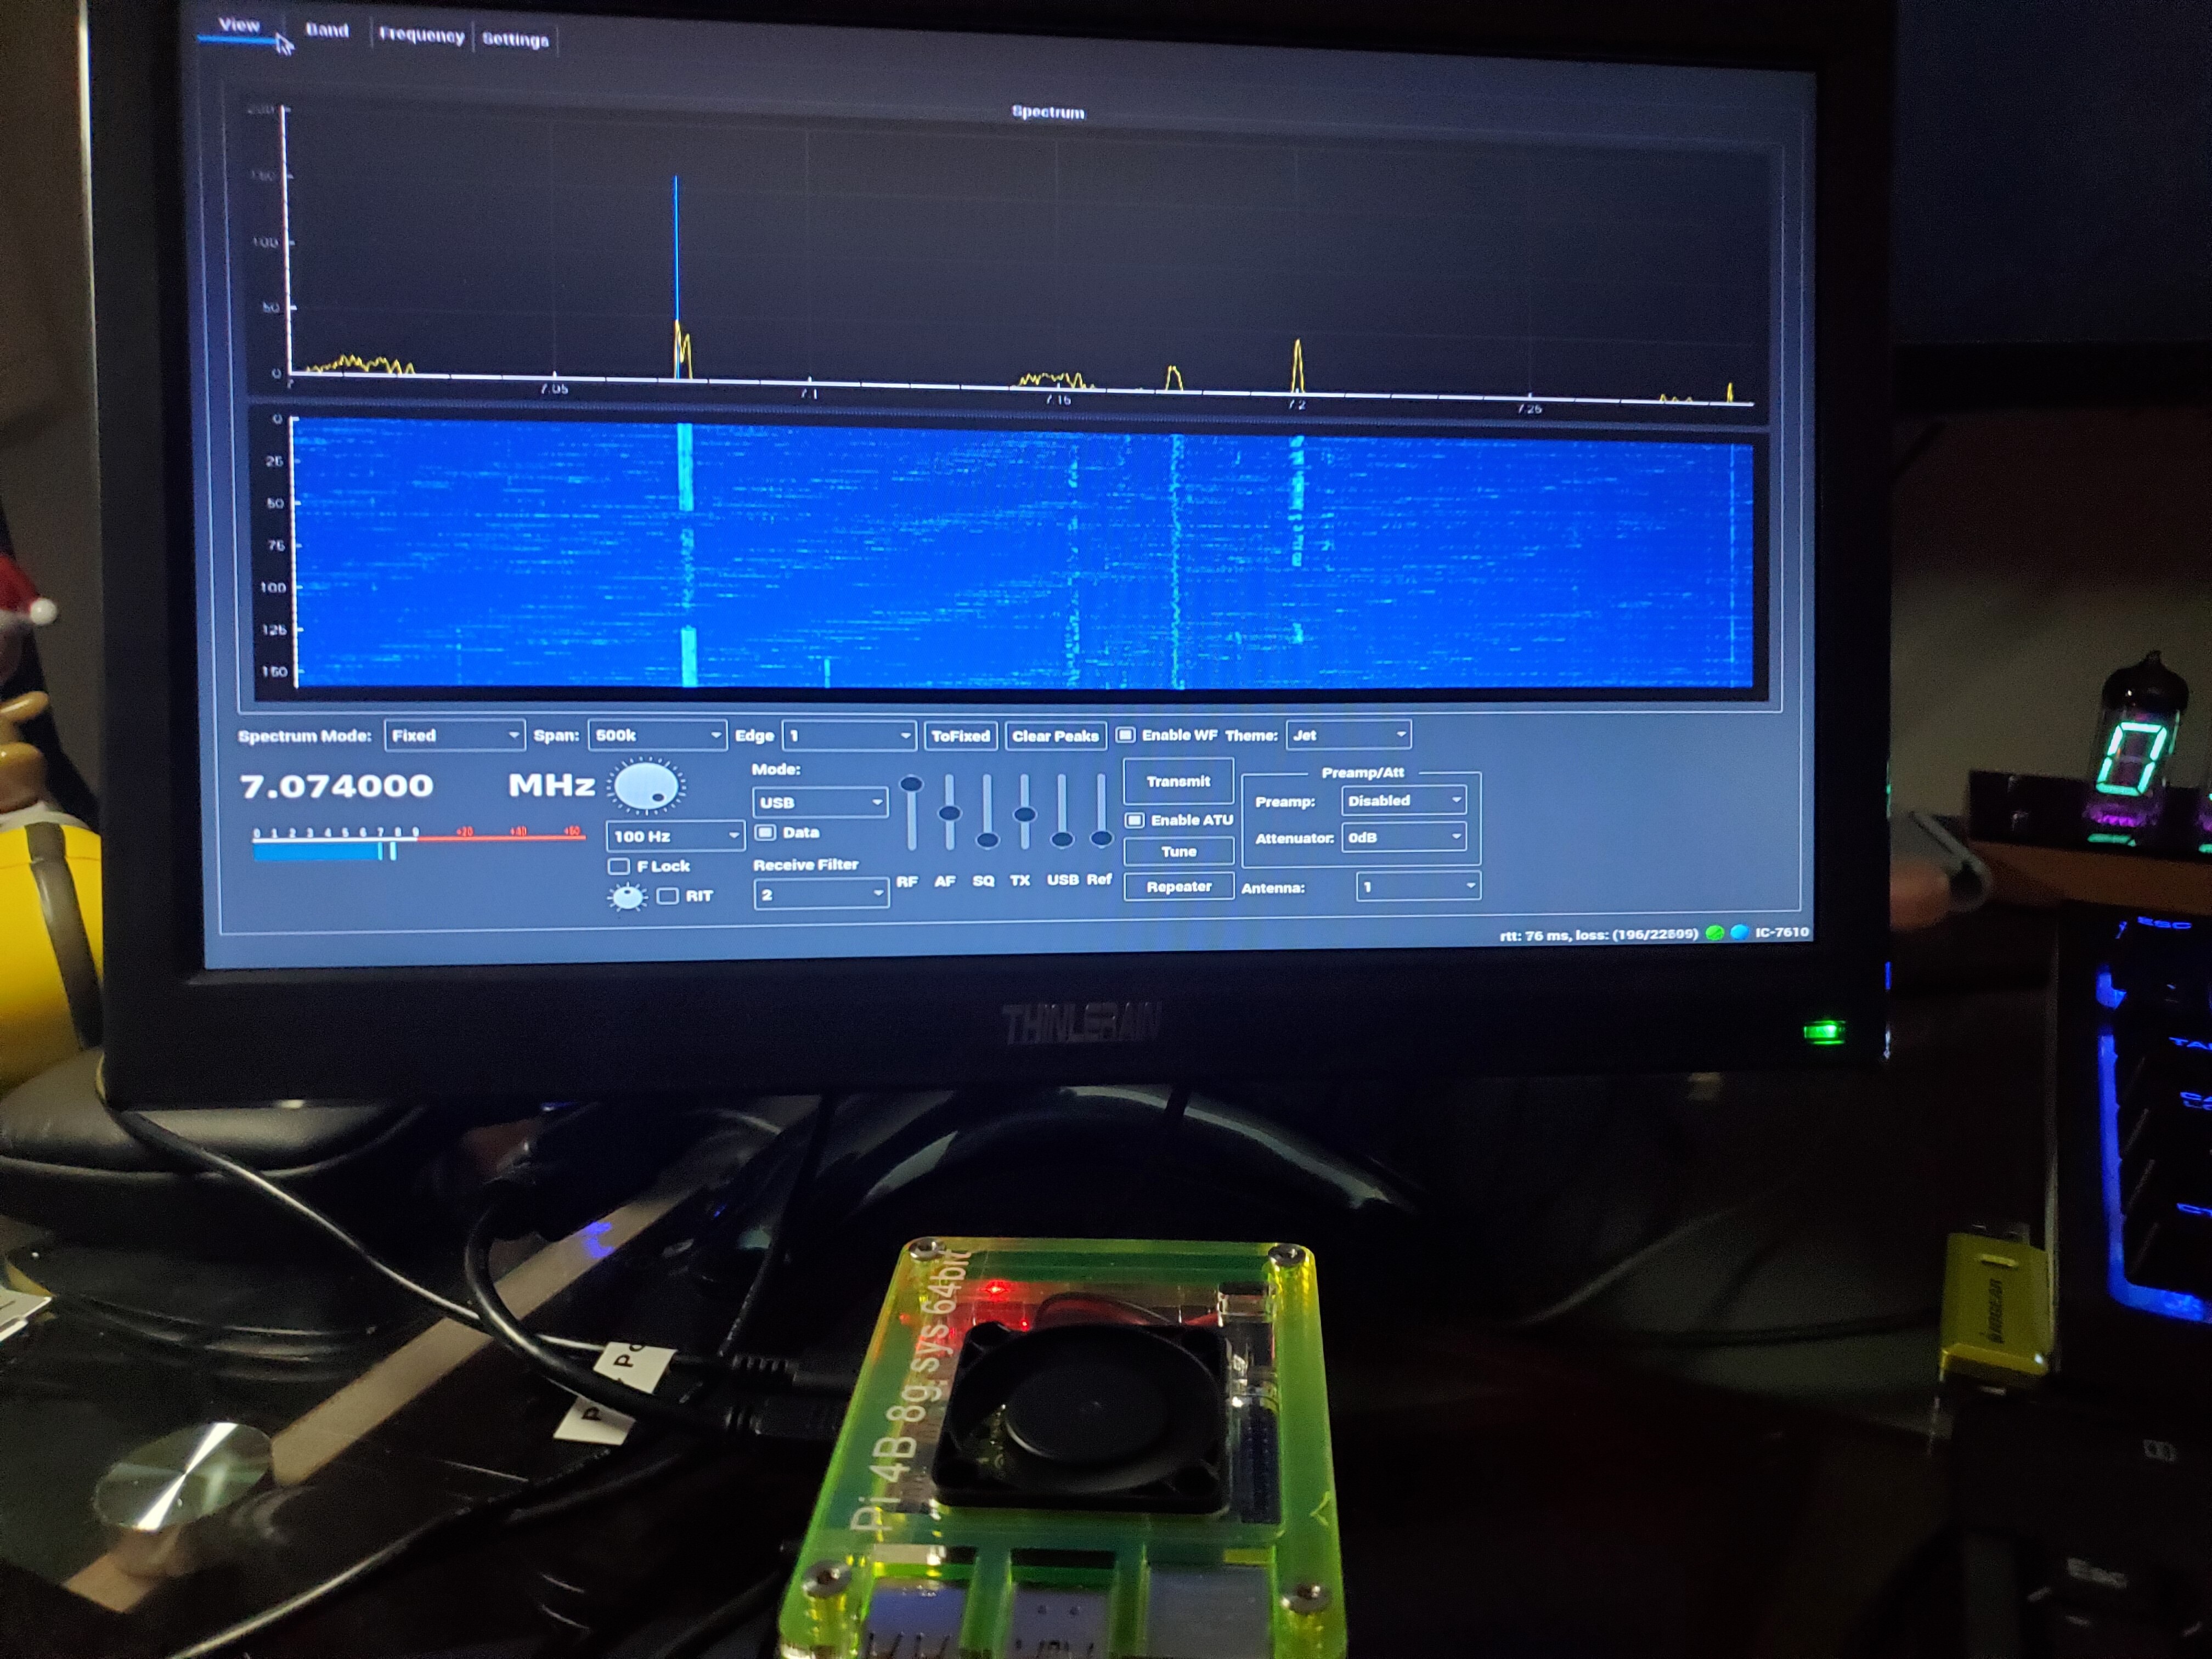
wfview is running on the pi4!!! Got waterfall and all, Just got to figure how to get it to fit on screen.
Rite now its hard to use and setup. Also need to see if Im actually getting audio from the jack on the pi.
Thanks alot for the help and suggestions. Much appreciated. Hope this got a bug nailed, at least for my build.
One tip on the screen, you can press F11 to toggle full-screen mode, and that may cause the UI to resize and fit better. What resolution are you running? Maybe we can make the UI a bit more friendly – you are the second person to mention not being able to see everything on the Pi.
What rig are you using, and what do you think of it so far?
I have wfview running on my laptop and now the RaspberryPi4B. Rite now Im using my 7610, but am
thinking of using the Pi with my 7300. Really like the software, considering the Icom Remote software is
expensive, where WFview is free with great help from
people like you. My display was 1020x600 then went down,think if I increase the resolution will shrink the size of the individual windows? Anyway a minor issue.
Im 79 and I was really on the giving up mode till you started working with me and probably others who read these posts. Keep up the good work.
Allen
So far today, no audio out of pi 4. Not sure of what settings to use or let wfview use defaults.
Tried all kinds of monitor settings and still cant get wfview to fit screen even on my big monitors.
Took photos but apparently we cant attach them to these messages…
If you are using an HDMI monitor (with sound) on your Pi4 then audio should just work. You may have to manually select if you are using the 3.5mm audio output though?
Audio devices in Linux tend to have long and complicated names, HDMI output on my Pi4 for example is: alsa_output_platform-bcm2835_audio_digital_stereo
As far as screen size, I find that the best option with a small screen on Pi is to run wfview in fullscreen mode (Settings/Show Full Screen) that is how I am running a Pi4 with a 7" touch screen:
I would have thought that 640x480 is just too small to fit everything in to be honest (did you try full screen mode?).
My 7” touchscreen is 1024x600 and in fullscreen mode fits perfectly. What resolution are you using on your 24” screen as I would expect it to be at least 1920x1080 and that is more than enough space to fit wfview.
One thing you can try which will set various defaults is from the Pi menu, Preferences/Appearance Settings and in the Defaults menu set defaults for Small Screens.
Of course my HP laptop works fine runs Windows 10 Pro.
Still working on Pi fit screen and audio. That it for now. Let
ya know when I hit the right settings
Think I got the problem found. When I originally burned the image. I changed the config.txt file with one that I have reused several times. This is where the video is messed up.
My room mate downloaded and burned the img file. So Im having him reburn it so I can get the original config.txt for that build. Hopefully this will either fix it or allow me to edit the file to get proper settings of a default file. Will advise later, but Im betting this is the problem. My Bad!
Yes sir. With my eyes the bigger the better hi hi. 73
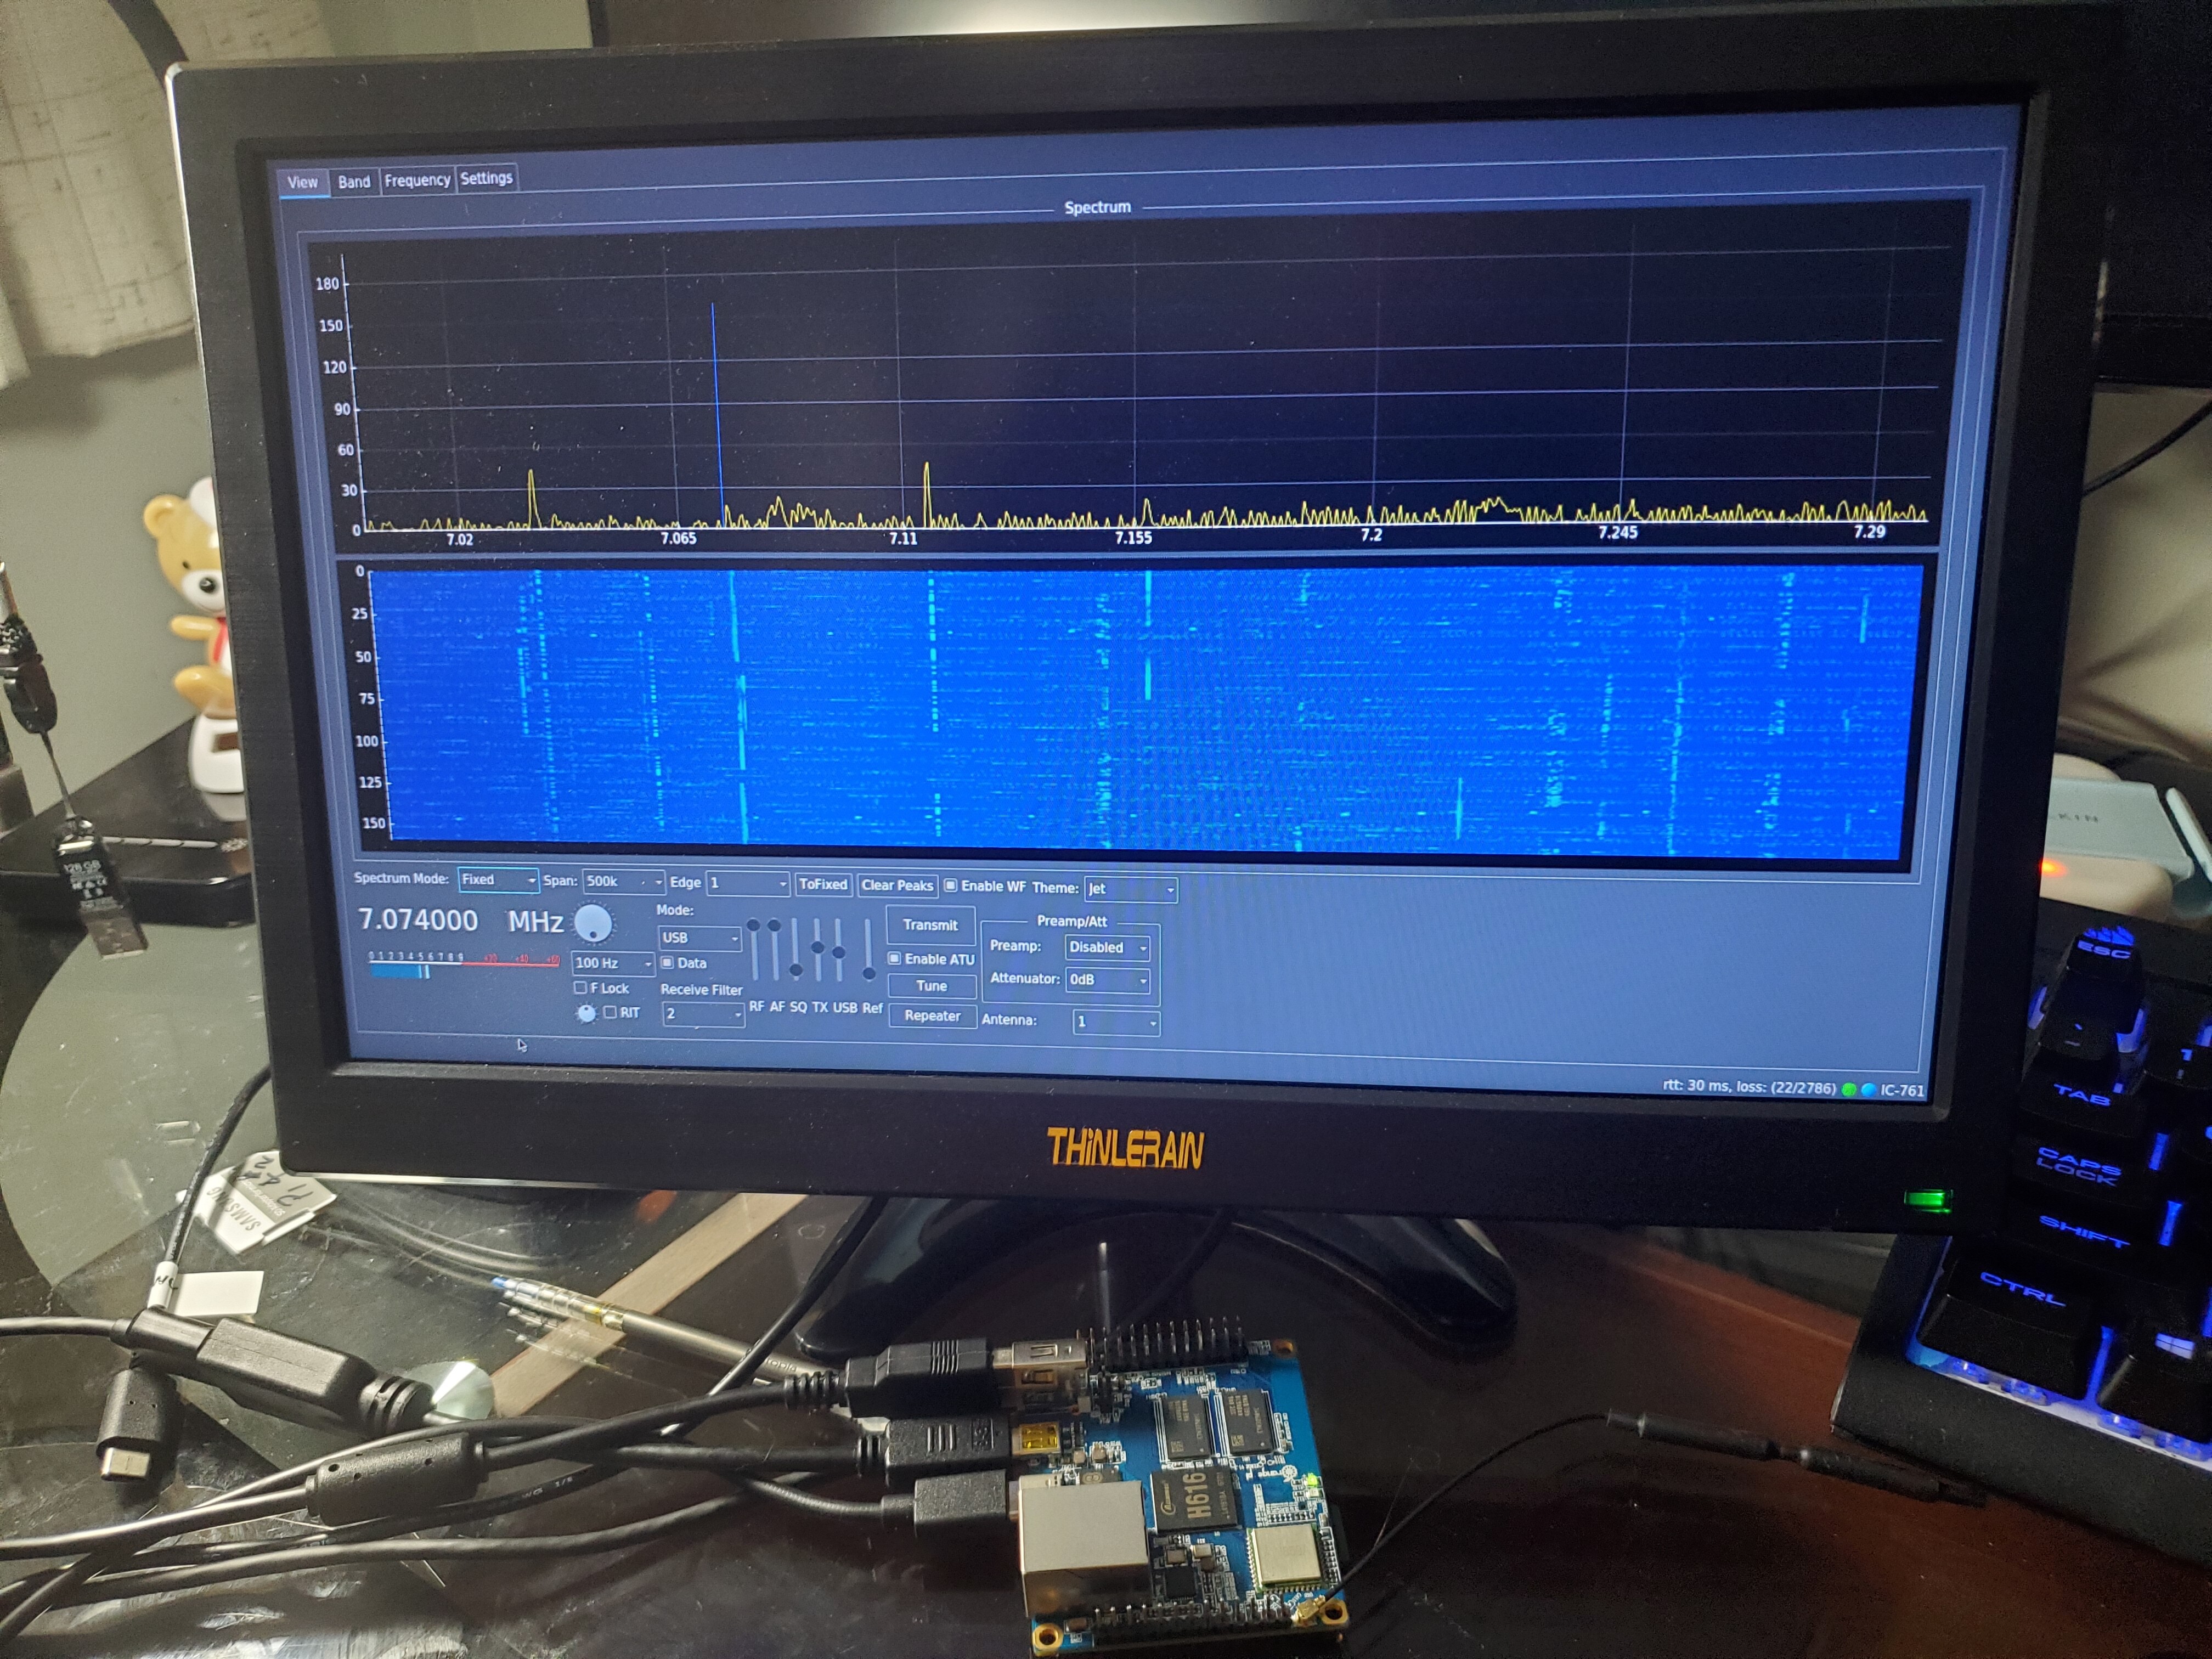
I think I will try to tackle the OrangePi now. While all
the work is fresh in my head.
A much relieved fellow Ham Operator.
Allen
Its fixed and looks better that this picture even…Love it. Got to figure audio to radio mike.
receive is good. Band conditions not so good so listed to FT8
Look whos learning! Got ambitious and thought to myself “self why dont you try to install wfview on the OrangePI again?” So I did!
Went quite well, the file structure is a bit different but still the install went well. I entered each line of INSTALL.md and went fine until the dreaded make -j. It crashed several times and reentering the
lines of code previously didnt help. Then I had a brain storm (hey it can happen), and tried just make.
It started writing the files but was doing it very slowly, like at 30 secs a line or a little more, but it got rite to the end. Then I went to root and rand sudo ./install.sh. Bang it worked! So here is a shot of the board and screen running. Dont ever give up! Oh, I dont want to hear about the messy desk. Ive been busy.
Allen
Yes I have seen that on the 2GB RPi4, where make -j tries to automatically choose how many compile operations to perform in parallel based on the number of CPU cores available. On some machines, this can exhaust all available RAM and the compile fails. make on its own will just run a single compile at a time. You can always try make -j2 which will try to use 2 CPU cores.
I dont have an orangepi… I do have raspberry pi 3 and 4 … it’s the IC-718 I would love to connect better with over the CI-V cable from linux/raspian… (you can blame that nomadic YouTubeer Kevin KB9RLW for me finding you